Automailer
🚧 Page Under Construction 🚧
We are still working on fully documenting this feature. While some documentation may still be listed below it may be incomplete, erroneous, and subject to change.Features
Automated emails with integrated reports straight from Encompass. With Automailer, you can setup reports to be delivered on an automated schedule to get your users and stakeholders the right information at the right time! 👊
Automailer is capable of sending emails to multiple users at the same time and can even do this dynamically from a loan field that contains an email address. For example, you may want to send a specific report to all your loan officers on a regular basis. You only want them receive the information for their own loans though so they can focus on what is important to them. With Automailer, you can do exactly that by using a loan field containing the assigned loan officer's email address.
caution
As the Automailer requires a user to be logged in for the automations to run, it might be best to have a dedicated user and machine for running automations.
Video Tutorial
Setup
Enable Automailer
- In Encompass
- Click on the Settings Menu
- Expand the Community Menu
- Click on PluginManagement

- Select the Automailer plugin from the dropdown
- Specified access will control what users get get to take advantage of this tool. All Access is typical for this tool
Encompass Reports
- In Encompass
- Open the Reports tab
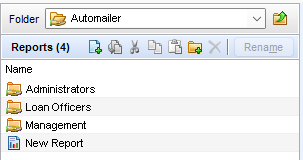
- In the Public Reports folder, create a new folder and name it Automailer:
- Open the new Automailer folder
- This new folder will house any reports that you want accessible to Automailer
- In order to continue setting up Automailer, you'll need to create at least one new report in the Automailer folder
- You can also create folders nested in the Automailer folder in order to better organize your reports:

Automailer Configuration
- After setting up the Automailer reports folder and some reports within the folder, you can now start working on creating an Automailer automation
- In Encompass
- Click on the Settings Menu
- Select Automailer:
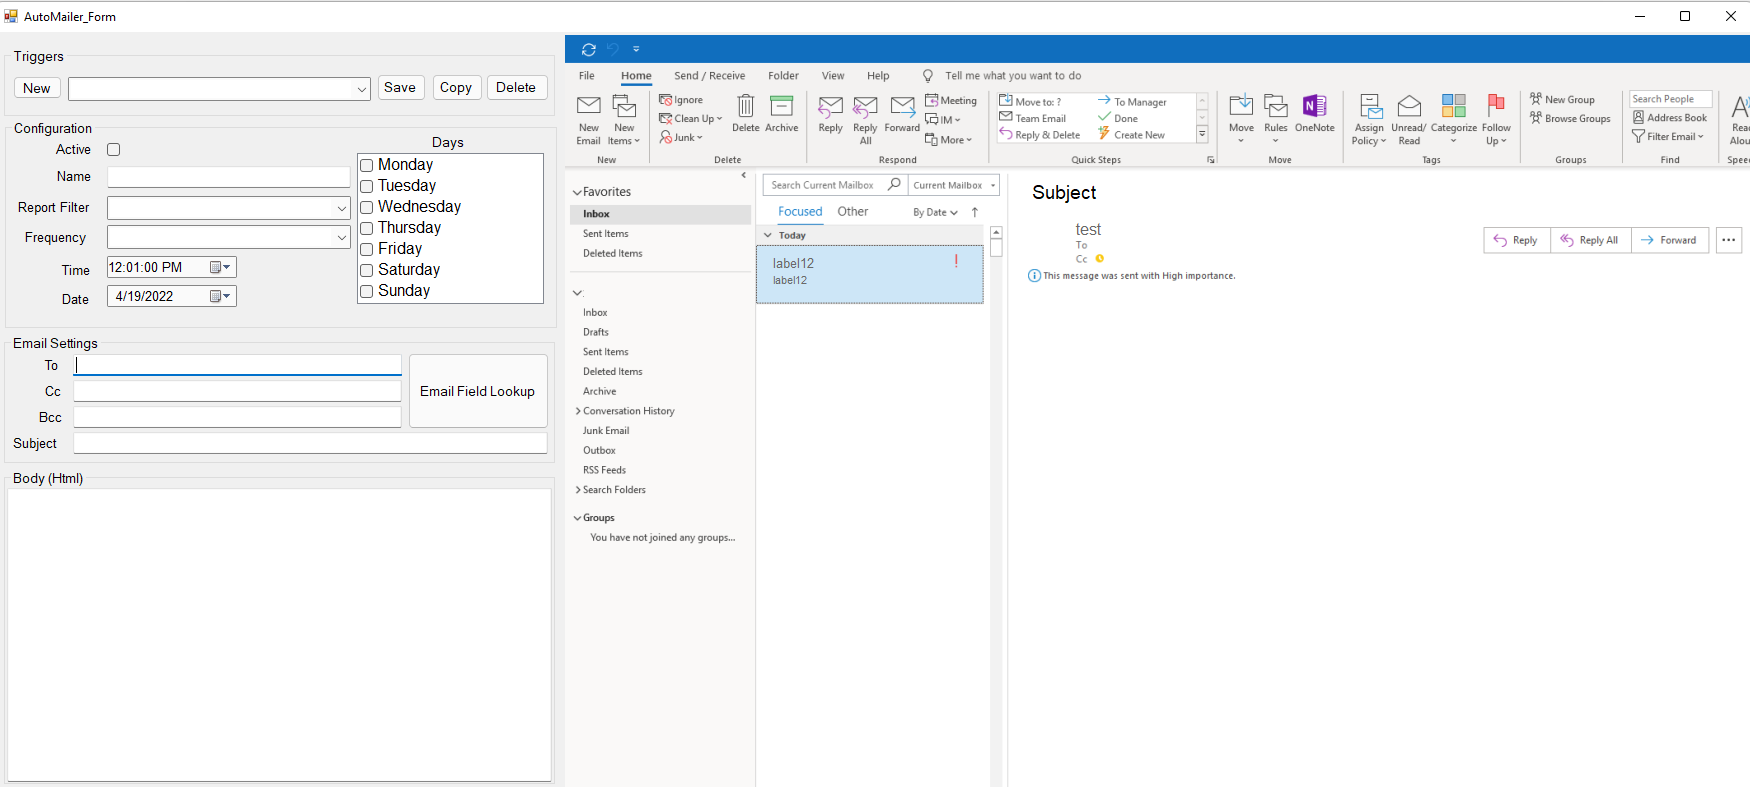
- The Automailer configuration window will open. The Automailer configuration settings are all found on the left panel while the right panel loads Outlook in order to provide a preview of the email that will be sent:

You can now setup and save a new automation by using the configuration options available:
- Active Indicator: If this is not checked, the automation will not be run
- Name: The name of the automation
- Report Filter: Select a report from the list shown to be used as the filter for the automation. This report will be used to determine what emails will be sent. For example, if the report returns no results, no emails will be sent. If the report returns 2 results, 2 emails will be sent, 1 for each loan.
- Frequency: How often the report should be run including additional indicators to run on certain days of the week
- Time: What time the automation should run
- Date: The effective date for the automation
- Email To List: Email recipients for this automation. If you need to send to multiple, separate with a comma.
- Email CC List: Email CC recipients for this automation. If you need to send to multiple, separate with a comma.
- Email BCC List: Email BCC recipients for this automation. If you need to send to multiple, separate with a comma.
- Email Subject: The subject of the email
- Email Body: The body of the email with full HTML formatting available
info
The Email Field Lookup button can be used to find and insert loan fields containing email addresses.
Usage
caution
Automailer automations will only run if a user with Automailer permissions is logged in to Encompass at the time the automation is scheduled to occur.
- Once an automation has been configured
- Logout and back in to Encompass with a user that has permissions for Automailer
- Automailer will automatically process automations in the background on the schedule that has been configured
- There is no pop-up windows or confirmations that the user will see, just seamless automation 🎉