Disable Services
Features
Want to limit access to some or all service providers? With this tool, you can do precisely that. And it's easy! And it's free! Amazing! Somebody buy Zach a 🍺 or several 🍻 or a fancy smancy 🍹
Video Tutorial
Setup
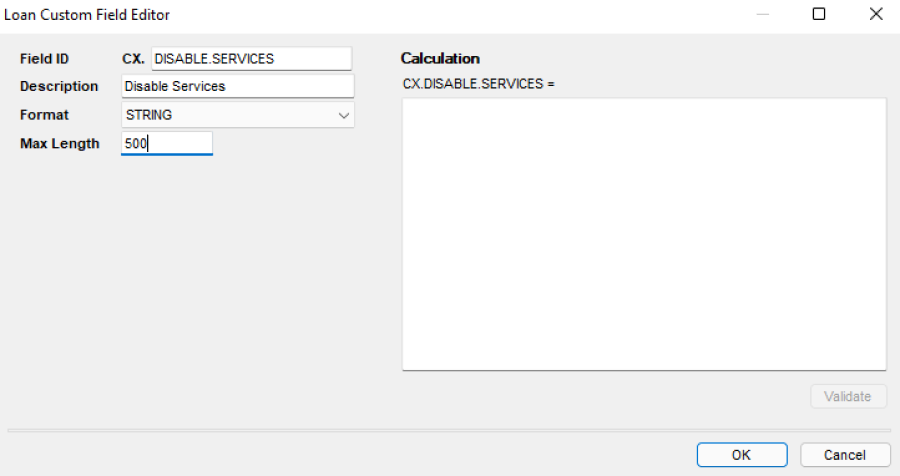
Create CX.DISABLE.SERVICES field
A custom field needs to be created and the ID needs to be CX.DISABLE.SERVICES. The custom field should be a String format with a large maximum length (500 characters). You can adjust the character limit to fit your specific needs. For example, if you only want to disable the service for one or a couple services, you likely do not need 500 characters to do so. It is only important that you allow enough characters to be able to disable the services that you need which may need some investigation.
Enable Disable Services in Plugin Management
- In Encompass
- Click on the Settings Menu
- Expand the Community Menu
- Click on PluginManagement

- Enable the Disable Services tool
Populate CX.DISABLE.SERVICES field
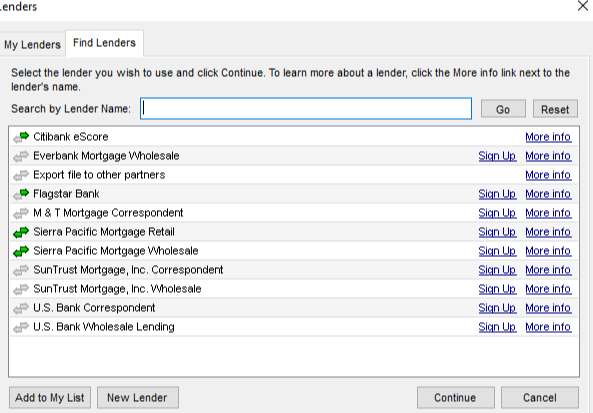
CX.DISABLE.SERVICES should contain a comma separated list of the bolded text from the services menu OR a list from the Access Lenders menu. To see the list of possible options to limit for Access Lenders, click on the Services tab and then click on Access Lenders. Under the Find Lenders tab is all the lenders you can restrict access ordering from. To restrict access to a lender in this list, make sure CX.DISABLE.SERVICES is populated with the lender's name exactly how it shows in the order menu.
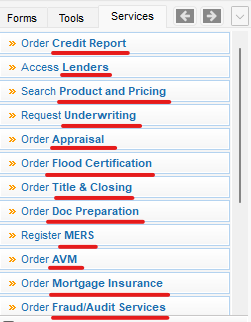
For example, if you wanted to restrict ordering credit, and order the AVM, you'd need to populate CX.DISABLE.SERVICES with the following:
Credit Report, AVM
And then enabled users would see the following, like magic:
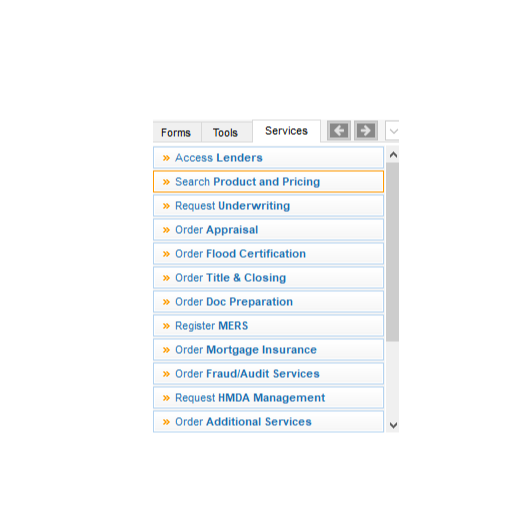
Or a more drastic example, set CX.DISABLE.SERVICES to:
Credit Report, Lenders, Product and Pricing, Underwriting, Flood Certification, Title & Closing, Doc Preparation, MERS, Mortgage Insurance, Fraud/Audit Services, HMDA Management, Additional Services, AVM, Investors, Appraisal
In this scenario, enabled users (including super admins), would see the following:
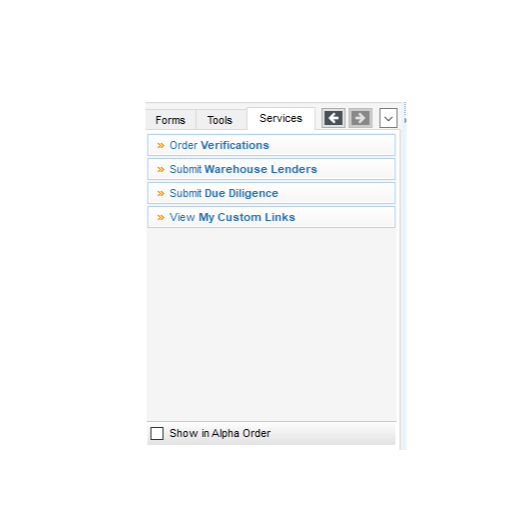
Restricting Lenders
The restrictions don't just stop at the top-level services menu. In addition, you can restrict access to the individual lenders. To do so, you need to ensure that CX.DISABLE.SERVICES is not populated with Lenders. Once you've confirmed that the lenders service is not restricted, to restrict individual lenders:
- Click on the Services tab and then click on Access Lenders:
- This will bring up a new menu.
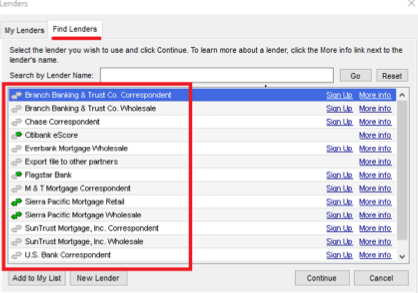
- You will need to populate CX.DISABLE.SERVICES with the lender's name exactly how it shows in the order menu. For example to restrict some of what is shown above, CX.DISABLE.SERVICES would need to be populated with:
Branch Banking & Trust Co. Correspondent, Branch Banking & Trust Co. Wholesale, Chase Correspondent
And then the user would see the following when accessing Services > Access Lenders which includes a pop-up message:
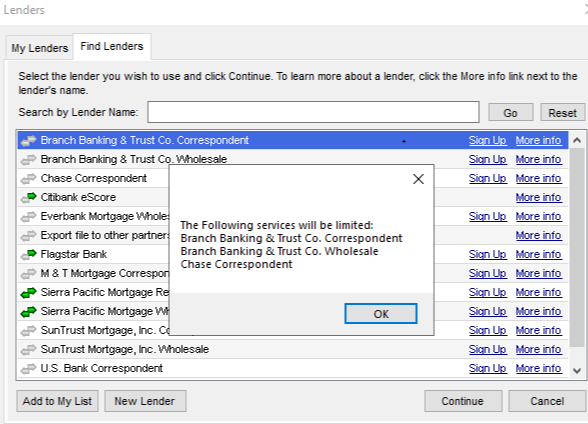
- After the user clicks OK, the Lenders in the menu will be disabled based on what has been populated to CX.DISABLE.SERVICES. For example:
If CX.DISABLE.SERVICES is populated with:
Branch Banking & Trust Co. Correspondent, Branch Banking & Trust Co. Wholesale, Chase Correspondent
Then the user (including Super Admins) will see the following:
